Why Engage

From big-picture perspective to detail-oriented production, we are proud to deliver creative, integrated print solutions that not only look good, but inspire audiences, share messages and drive results for customers across different industries.

Our full line of print capabilities, including planning and design, offset and digital printing, variable data, finishing and bindery, and mailing coordination, make us your go-to partner for integrated print solutions.

Get in Touch Request Samples
Engage building
blue ribbon

We Go the Extra Mile

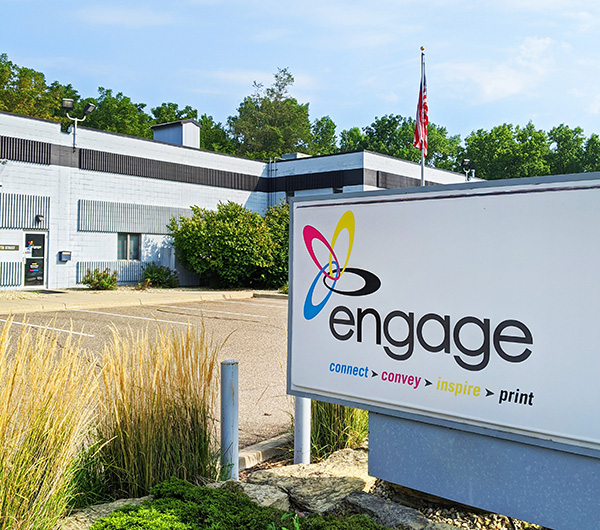
We problem solve. We think on our feet. We pay attention to the details. It’s just how we work. From the time we receive a request to the moment a print job heads out the door, our customers know we’ve committed ourselves to producing the best possible print solution.

trophy cup

We Provide Stellar Customer Service

Highly personalized, responsive service sets us apart. We do everything in our power to make you look your best – because print is our passion and because we measure our success by yours.

chat bubbles

We Know Your Name and You'll Know Ours

When you work with Engage, you partner with a local, family-owned business, which means you’ll get to know us and see our dedication to our values in every interaction and every job.

SMIF logo

We love working with Engage Print because we know we can always expect high-quality work on an efficient timeline that works for us. Plus, the staff are such genuinely nice people, that it makes it easy to keep going back!

Katie Godfrey Demmer, Communications Director

Southern Minnesota Initiative Foundation

Learn more about our servicesSee Capabilities

Frequently Asked Questions

  • What info do you need to provide a price or print my job?

    The basic job specs required to generate an accurate estimate include: finished size, number of pages or panels, folding or binding style, inks to be used (full color, black and white, or spot colors), paper choice, and quantity. Additional information is required if your project will be mailed, or have any special features like die cuts, foil stamping or embossing. But don’t worry if you aren’t sure about all of those questions — request an estimate with whatever specs you do know, and one of our knowledgeable print consultants will connect with you to walk you through the process and work out any additional details. 

  • How do I know what paper weight to choose?

    Paper is categorized by weight class, which is indicated by a letter, and then ordered by actual weight, indicated by a number. Within each class, a higher number means heavier paper. As an example, you might see “100#T,” which would be pronounced “one hundred pound text.” 

    The lightest classes are “Bond” and “Writing” (W). Weight numbers in these categories are usually 20, 24 and 28. Plain copy paper and economy envelopes are typically 20 lb. bond. High quality letterhead and envelopes are often 24#W or 28#W. The next class of paper is “Text” (T), commonly used for flyers, brochures, guts of booklets, posters and more. Text weight numbers include 50, 60, 70, 80 and 100. 

    The heaviest stocks are “Cover” (C) weights and board stock (expressed as “pts” – “points”). Standard weights for cover stock are 65, 80 and 100 pounds, and board stocks usually come in even weights from 10 to 20 pts. What most people call “cardstock” is usually equivalent to 65#C, and cover weights are typically used for, you guessed it, booklet covers, as well as brochures, pocket folders, and postcards and direct mail. Board weights are standard choices for postcards and packaging. 

    The most common weights of paper used in commercial printing are 80#T, 100#T, 80#C and 100#C, but we offer a wide variety of paper weights and finishes, including colors and textures. Talk to your print consultant to help determine what paper options are best for your project.

  • What is a “self-cover” vs. “plus-cover” booklet?

    A basic saddle-stitched booklet is made by stapling together two or more 4-page signatures. A signature is created when you take a single sheet of paper and fold it in half. By stacking these signatures together and stapling them in the center, you can make booklets of varying page counts (always in multiples of four: 8, 12, 16, etc.). The outside signature is the cover, and the inside pages are called the “guts.” When both the cover and guts are printed on the same paper stock, the booklet is known as a self-cover booklet. If a different stock is used for the covers, like a heavier weight or different color, the booklet is known as a plus-cover booklet. For this type of booklet, the length will typically be listed as the number of interior pages “plus cover.” For example, if your booklet has 20 pages total and you were going to print all the pages on 100#T, you would ask for a 20-page self-cover booklet. If you wanted the guts on 100#T but the covers on 100#C, you would say your booklet is “16 pages plus cover.” 

  • What does “saddle-stitched” mean?

    Saddle-stitching is a method of booklet binding that uses staples on the spine to hold the pages together. It’s an easy and cost-effective method for creating booklets and the most common binding we use for our customers. (See What is a “self-cover” vs. “plus-cover” booklet? above for more details about booklets.)

  • What does “4CP” mean? What is CMYK?

    Both “4CP” and “CMYK” refer to full-color printing and are interchangeable terms. The term “4CP” is shorthand for “four color process,” because most full-color printing is done with four basic ink colors: Cyan, Magenta, Yellow and Black, or CMYK. Whether digital or offset, unless your project is being printed in black only or with spot color inks, it will be printed in 4CP / CMYK.

  • What is a bleed?

    In design and printing, we say a project “bleeds” if the artwork includes graphics that extend all the way to the edge of the page, such as colored backgrounds or photos. In these cases, we require an additional ⅛” of room on each side, outside the actual final artwork, to ensure proper finishing and trimming. The term “bleed” can refer to the artwork itself or to this extra margin area. As an example, if you want to print a flyer with a blue background, but you don’t want a white border around the edge, you must design your flyer with bleeds. For a standard 8.5” x 11” flyer, that means the actual printed area would be 8.75” x 11.25” (final size plus ⅛” on each side), and your blue background would need to fill that whole space. We then print the flyer at the larger size, and trim off the excess to ensure a perfectly clean final edge. (Whether or not your project has bleeds, you should always keep all critical information at least 0.25” inside the final trim area.) For detailed instructions about how to add bleeds to your document, see our file prep guide.

  • Can I print a photo on an envelope?

    Absolutely! There are several options available for printing a photo on an envelope, but the most popular choice for our customers is our digital envelope press, which can print full-color envelopes at low cost, even with bleeds or at small quantities. Contact us today to request samples of this industry-leading print capability!

  • Can you help me with design?

    Yes! We offer a full range of planning and design services, whether you simply need an existing file updated or are starting with a new idea that requires full creative development. We’re also available to consult on production planning to ensure your vision can be realized on budget and as desired. Get in touch today to discuss your project with one of our print consultants and receive an estimate.

  • Do you provide proofs? Will I see the job before it’s printed?

    We offer several types of proofs. Proofs are how your job is checked for correctness – by us and by you – before it is printed. The kinds of proofs you receive will depend on your project’s specs and your preferences. We generate both soft and hard proofs for every job to ensure quality and accuracy.

    Soft proofs: Soft proofs are digital or electronic proofs, delivered in PDF format via email. Once the initial proof has been generated by our prepress department, your print consultant will review it for accuracy before sending it to you. When you receive your proof, review it closely for any errors or additional required changes. Approving your soft proof means that all aspects of the artwork are correct and match what you expect to see in the final product. Because these proofs are electronic, the colors on your screen may differ from the actual colors once printed, but the on-screen representation will be as close to accurate as possible.

    Hard proofs: Hard proofs are physical prints of your job and are the final checkpoint for accuracy and color before your job is sent to the press. All jobs receive a hard proof that is reviewed by your print consultant, and whether or not you choose to see the hard proof is up to you. Be sure to let your consultant know at the start of your project if you would like to look at the hard proofs so we can plan your job accordingly.

    The type of hard proof generated depends on which press will be used. Jobs that will be printed on one of our digital presses will have proofs that are nearly identical to the final product – with the same printing method and paper as the production run. Jobs that will be printed on an offset press will have representative proofs. These proofs allow us to do final checks for artwork and layout, but are not generated by the actual presses, which would be cost-prohibitive. Spot color offset jobs receive just a low-resolution imposition proof, intended for reviewing the artwork only, and may not accurately represent ink colors. Full-color offset jobs receive two kinds of hard proofs: a high-resolution contract proof for checking color, and a low-resolution imposition proof for reviewing layout and page order. The press operator uses the contract proof as a guide to help achieve the desired colors on the press, and the finishing and bindery team refers to the imposition proof to ensure correct folding and assembly.

  • Is my image big enough to print?

    The general guideline for printing high-quality images is 300 dpi at actual size, which means the image should have 300 pixels for every inch of width and height. For example, if an image in your document is 3” x 4” at final output size, the image file (not including any portions of the image that may have been cropped out) should be 900 pixels wide by 1200 pixels high. Images that are smaller can still be printed, but might not look as crisp in your finished piece. If an image is less than 200 dpi, we may flag it in preproduction and ask if you have a higher resolution version or an alternate image that could be used instead. Large format projects such as signage, posters and banners often have lower image resolution requirements, and recommended resolution will vary depending on the project. 

    File sizes (represented in KB or MB) are not as reliable as actual dimensions (represented by pixels) when determining image size, because various file formats have different amounts of compression. While larger file sizes are typically better than smaller sizes, a bigger file does not guarantee a print-quality image. As a baseline, however, images with file sizes of at least 1 MB (1000 KB) are more likely to work well for print than images that are less than 1 MB.

  • How do I send you my files?

    The easiest way to submit your files is here on our website by clicking “Send a File” at the top of the page. Fill out the form and add your files, then click “Send.” For smaller files (less than 15 MB), you may also submit artwork by emailing it to your print consultant. While not required, we recommend zipping your files to avoid any potential corruption in transit.